December 12, 2012

The nutty-chocolaty high ~ Chocolate hazelnut & almond cookies~


Those of you, who have ever tried Nutella even once (although I am quite sure there would hardly be anyone who hasn't gone for the second try!!), would wholly back me up in my affection towards the same. For the uninitiated, Nutella is the brand name for a chocolate hazelnut spread found in almost all grocery stores now and trust me - its divine. My very dramatic introduction to this chocolate spread was during my first few days here in the US, grocery shopping with my German friend. While strolling along the aisles, I was startled with a shriek from an adjoining aisle and I rushed back to find her squeaking with happiness holding on tightly to a small chocolate container. She was literally jumping with joy all the while exclaiming "They have it HERE!!"...While I certainly won't deny finding her reaction a bit over the top, yet just out of respect for her intense adoration, I bought a jar for myself. Though quite reluctantly, soon I too became a fan of this "heavenly"-chocolaty-nutty deliciousness and honestly, I have never looked back since! Having become an ardent fan, I could now completely understand and relate to that momentary indiscretion of my homesick friend. Yeah..it happens..

So if there's anything at all, that I would go back and add to my growing up years, I am most certain that this would definitely be it. If it could make a grown up drool , think about those naive, chocolate crazy kids. I can only imagine. I say so because recently even after my dwindling affection towards overtly sweet delights, I still continue to savor this on those occasions when I need a true pick-me-up. I cannot really assure you of its health benefits, but surely there are some very serious mood benefits ;)

It was that fine day while watching Giada cook up some of her trust worthy recipes, I saw her make these delicious chewy Nutella cookies and well, I had to try it. I followed her recipe completely except for some changes here and there. Here are some alterations that I made:

- Doubled the Nutella quantity to intensify the taste (remember I am biased! ;)
- Cut down the sugar quantity by half.
- Added in a pinch of instant coffee to intensify the chocolate taste.
- To add a crunch to the cookies, I folded in some roasted sliced almonds. Diced hazelnuts would have been perfect but I didn't have any at that time so chose almonds instead.
- Decreased the baking time to 9 minutes to get a semi-chewy texture that I desired.

Here's my version of Giada's recipe for these very easy Chocolate-hazelnut smooches as she calls them, even though I would rather stick to a more simpler nomenclature - Chocolate hazelnut & almond cookies.

Chocolate hazelnut & almond cookies
(Adapted from Giada's Chocolate-hazelnut smooches)


Chocolate hazelnut spread (a.k.a. Nutella) acquires a new avatar with these perfectly sweet and crunchy 'n' chewy cookies right for some holiday baking. The extra chocolate chip adds in to the moderately chocolaty cookie base while the almonds liven up the hazelnut-'ty' undertone. 

Ingredients: (Makes 40 cookies)

1 3/4 C All-purpose flour
1 tsp baking soda
1/2 tsp salt
1/4 tsp instant coffee granules
1/4 C Roasted sliced almonds (Optional)

1 C chocolate hazelnut spread (I used 
Nutella
1/2 C (1 stick) butter at room temperature.
1/4 C sugar
1/2 C light brown sugar
1 tsp vanilla extract
1 egg
Semi-sweet chocolate chips (Optional)

Method:

1. Dry ingredient mix- Mix the flour, baking soda, salt, instant coffee granules and almonds in a bowl and set aside.

2. Wet ingredient mix - In a separate mixing bowl, add in the chocolate hazelnut spread, butter and the two sugars. Using a hand mixer, mix well until creamy (2-3 mins).Then add in the egg and vanilla into the sugar-butter mixture and blend well (~ 1 min).

3. Now stir in the dry ingredient mix into the wet mix, until well integrated. The cookie dough is ready to be baked.

4. In the meantime, preheat the oven to 375oC.

5. Line a sheet pan with parchment paper and using a tablespoon measure, scoop out the dough. Roll the dough into balls and line them on the sheet pan about a inch apart.

6. Place the rack at the center and bake the cookies for 8 1/2 - 9 minutes. Adjust time according to the texture required.

7. Immediately after taking the cookies out of the oven, lightly press a chocolate chip into each cookie. The chocolate chip melts from the heat of the cookie and sticks to it. To cool completely, lay out the cookies on to a wire rack.


These cookies are a true winner in every sense. Adequately chewy yet crunchy and most importantly the right amount of sweetness makes it a recipe that I am going to hold on to. Its really hard to resist a second one and I bet neither could you. Tried and tested, dirty up your hands with this easy-peasy recipe, if you want to have a stack of these home made delights just perfect to offer your guests this holiday season.

Happy baking! :)
J

P.S. I am submitting this recipe to :
- "Kid's delight- Story book special" hosted by Archana and Srivalli.
- "Merry Christmas specials" hosted by Sheelu
- "Know your natural sweetness-Brown sugar" hosted by Kriti and Jagruti
- "Christmas recipes" hosted by Swathi
- "Celebrate Christmas" hosted by Divya and Jagruti.
- "Bake fest" hosted by Sumee and Vardhini.
- "Let's cook/bake for Valentine" hosted by Simply sensational food.
- "Let's bake love" hosted by Deepali.
- "Bake Fest" hosted by Vardhini from Cook's Joy.


November 20, 2012

The joyous treat - Besan Sooji / Besan Rava ladoo


Time surely has some mighty wings..coz it always flies by in a blink. At times, it’s so hard to believe that it’s been almost 2 years since I first tried my hand at besan ladoo and out of sheer enthusiasm posted it on Facebook. It was just a very naïve beginning to something I had no idea would turn out to be such a game (life?) changer. The legacy of posting pictures of any dish I was successful-at-my-first-try continued until the beginning of this year when it turned out to be a little more serious than that. This blog came into existence and it’s been a whole different journey since. I had always wished food to take a more sincere place in my life and besan ladoo seems to have been just a very auspicious start :)

My history with this recipe dates back to 2010 when my Ma was preparing this for Diwali and it piqued my interest so much that I had to try making it. Memories connect back to those days when my grandma would prepare these ladoos for us kids to gorge on with my sister being the most ardent fan of these delights. So being well aware of the emotional attachment of besan ladoo and Diwali, I took on the challenge.My first try at besan ladoo had turned out good but well not without its own share of mistakes – it had too much ghee. So this time around I made sure that the amount of ghee (even though it might not look a lot) was controlled, so that everyone feels comfortable gorging on these scrumptious snack/ sweet. To add a bit of crunchiness to the otherwise smooth textured ladoos, I added in the rava (sooji/semolina) along with some ghee roasted cashews and raisins.This time around I was very satisfied to have balanced both my adventurous and the health conscious self by balancing out the ghee.A big step ahead to start with :)


Besan Sooji ladoo / Besan Rava ladoo

This festive sweet typifies the perfect blend of the nuttiness of chick pea flour along with the crunch from coarse wheat semolina (sooji/rava), roasted till fragrant in ghee. Cashews and raisins add to the richness of this otherwise effortless treat.It forms quite a pair with the salty Chivda as Diwali faraal.

Ingredients: (Makes 20 ladoos using 1 T scoop)
2 C Besan/Chickpeas Flour
¾ C Sugar (I used cane sugar)
¼ C Rava / Sooji/ Wheat Semolina coarse
½ C Ghee 
¼ tsp Cardamom powder
2 T Roasted Cashews (Optional)
1 T Raisins (Optional)

Method:
1.  Dry roast both the besan and sooji separately on a low flame for about 10 minutes. The besan becomes fragrant while the sooji should be very evenly “light browned”. Keep stirring for an even roast.
2.  In a separate pan, add in 1 T of ghee and fry the raisins and the cashews till - the raisins plump up and the cashews are slightly browned. Keep aside.
3.  Add the rest of the ghee to a wide pan over low flame, and add in the roasted besan and sooji to it. Mix well to smoothen out any lumps.
4.  Roast the ghee-besan–sooji mixture till its fragrant and the mixture has a light brown tinge to it.
5.  Turn off the heat and then add in the sugar, cardamom powder, cashews and raisins. Stir to mix.
6.  Let the mixture cool till its tolerable to make ladoos. I used a 1 T scoop to measure out the ladoos and rolled them out by hand.

Some handy notes:
1. I used granulated cane sugar instead of the powdered one. It just adds in more  to the crunch. Opt out of it, if you like your ladoos smoother.
2. Roasting and continous stirring over a low flame is the key. The mixture can burn very easily, so make sure to stir and be around the stove.
3. These ladoos stays very well for about 2-3 weeks in the refrigerator and is a great source of protein (from the chick pea flour) and energy (from ghee and sugar). A great snack when eaten of course in moderation.

I served these Besan- rava ladoos along with the home made Chivda to all my friends who had come over for Diwali. It was just very touching to be able to reach out to everyone I had wanted to while I was preparing these treats. An honest and heartfelt intention rarely goes unnoticed :). Here's hoping these treats made all those who tasted these as much happy as I was while making them. This Diwali became just too special and here's wishing for an even better Thanksgiving :)

Have a great Thanksgiving folks!
Love and good wishes,
J

I am sending this entry to:
- "Lets celebrate-Indian sweets" hosted by UK Rasoi
- "My Diwali basket" hosted by Thou shalt cook
- "Diwali food fest" hosted by Anu
- "Bon Vivant #10: Festive feast" hosted by Sumee.
- "Diwali Dishes" hosted by Cook's Joy

November 4, 2012

Ushering in Diwali with Chivda a.k.a. Chuda mixture

Being away from something that you absolutely adore makes you feel in either or both of these ways – intermittent feelings of guilt for not paying attention and/or the unnerving tinge of self- doubt on returning to doing it. At this moment I feel the second while the first has been bothering me all this while I was away from this blog. Even though I am very thankful that new and exciting experiences like organizing events, teaching a class and learning a group dance, have been keeping me away, it nonetheless kept bothering me with the question – when am I writing my next post? Well now that I am back, that answers it I guess. Having done with explaining my absence from the blog, I shall now move on to the real reason and motivation of today’s post a.k.a. the Chivda.

Relieved of my responsibilities as an event planner, I was now left with the much needed space to finally think of making something for Diwali. Diwali and snacks almost seem synonymous and my first post on the series of Diwali snacks is devoted to the delicious and healthy snack – the Chivda. The fact that is so appealing to me about this decadent snack is its utmost soothing simplicity and clarity of ingredients. This snack has not been part of my growing up but I must confess that I have definitely grown to love it ever since the time I first tasted it from a friend’s Diwali-goodies packet sent from India. I have been in awe ever since. So simple yet so intricate and so delicate yet with so much clarity, is what makes this snack stick with me. Over these five years of my interaction with several Maharashtrians, I have tasted different and interesting versions of it and each time I would make a mental note of what I liked and what I didn’t.

So here’s my version of this snack which I have tried my best to make as close to the original as possible. And as with each new process, I was reconfirmed with one aspect of any recipe – the perfect balance of sweet, salty and sour – is essential for any recipe.


Chivda/ Chuda mixture


Crisp and oven roasted, thin flattened rice comes alive with a tempering that bonds together the zestiness of curry leaves along with the nuttiness of ground nuts and split chick peas. A very simple, distinct and healthy snack- this recipe is a keeper – Diwali or no Diwali. Also popularly known as Chuda mixture in Odia.

Ingredients:

1 lb Thin flattened rice/ Thin Poha (Easily available in any Indian store)

For the tempering:
¼ C Peanut oil
200 g raw peanuts
100 g Dalia/ Split Chick Peas
¼ tsp Asafetida / Hing
Handful of curry leaves
5-6 Dried red chillies/ Fresh green chillies
1½ tsp Cumin seeds/ Jeera
¼ tsp Turmeric powder

Salt to taste
½ tsp sugar
¼ tsp Amchur (Dried mango powder)

Method:
1.   Dry roasting the poha – The very traditional way of roasting on the stove top is effective but tedious. So burdened with having to stir the Poha I decided to place it in the oven and so thankful that I did.
Using the oven method: Spread out the poha on a sheet pan lined with wax paper (optional). Pre heat the oven to 350oF. Then place the sheet pan in the oven and dry roast for 10-12 minutes. Check once in between to stir for a uniform heat. The poha should feel crisp to touch and white in color.
2.   For the tadka: In a separate pan, add in half the oil and the peanuts right after. Stir fry the peanuts over medium heat till fragrant (2-3 minutes.) Once done, scoop them out to a separate plate.
3.   Then add in the dalia and roast it for 1-2 minutes till fragrant. Add in a pinch of turmeric powder to get a golden yellow color to the dalia. Scoop out into the peanut plate.
4.   Now add hing to the oil over medium heat and then add in the chillies and the curry leaves. Stir for a minute.Then stir in the cumin seeds till fragrant.
5.   Now add in the peanuts and dalia to the oil. Sprinkle the turmeric powder and stir for another minute.
6.   Meanwhile, transfer the crisp poha into a mixing bowl and then stir in the tadka/ tempering. Now add in the salt, sugar and amchur while the mixture is still hot.
7.   Adjust the final mixture according to taste and store in air tight containers.

The final result was as close to my imagination as possible with the only thing that I really missed was the dried coconut.This time I managed without it but I will definitely add it in whenever next I lay my hands onto it. 

So while I decide on the next Diwali snack, you guys have a great time :)
Love!
J

I am submitting this recipe to :
- "Fest celebration - Diwali" by Preeti and Surabhi
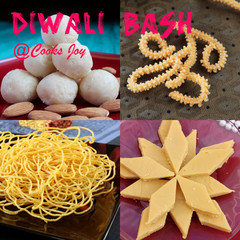
- "Diwali Bash" by Vardhini
- "Kid's delight: Healthy Makeovers" hosted by Rasi
- "Diwali food fest" hosted by Anu
- "Bon Vivant #10: Festive feast" hosted by Sumee.
- "Diwali Dishes" hosted by Cook's Joy

September 30, 2012

Of autumn warmth and Nan-Khatai


Long before terms like shortbread and cookie were introduced into my jargon, nan khatai ruled a special corner in my heart exclusively reserved for warm and gratifying baked goods. My first introduction to this nutty shortbread dates back to days when the only way my Ma would agree to serve us tea (the milky version that too!) was if it was with nan khatai. Haven’t tried dunking nan khatai in tea yet? Hmm….you might definitely want to :)

Sweet or salty, soft and powdery or crunchy and crumbly – this simple, few ingredient cookie has been an all-time favorite ever since. The basic recipe from my Ma had been tucked away neatly in one of my folders until that trip to the bakery last week. I tasted something so similar to nan khatai that it rejuvenated me with renewed energy to try it out. With the beginning of Fall, baking seems the best way to warm up the kitchen as well as memories with age old recipes. So, this is my first real baking venture of fall this year and what better way to start than with our own indigenous baking wonder- the nan khatai.

There are several recipes for nan khatai and of course several proportions to be mindful of. Since I find baking a little bit constricting, this recipe seems very soothing and welcoming for a baking novice like me since it allows me to experiment and that for me, is absolutely liberating. Nan khatai is basically made of all purpose flour or maida with varying proportions of chick pea flour or besan to bring in that nuttiness. Some add in rava or semolina for crispiness but I opted out of it for now. I desired for that flawless balance of nuttiness and crunchiness that would make me swoon in delight.

Nan-Khatai


This egg-less Indian shortbread represents an unique blend of nuttiness from chick-pea flour (besan) and warmth from Indian clarified butter (ghee) melding effortlessly with the richness of cashews. Soft yet firm and crumbly yet crunchy, it represents the quintessential basic Indian shortbread.

Ingredients:

1¼ C ghee / Unsalted Butter
¾ C Powdered Sugar

Sieve together:
½ tsp baking powder
2 C All purpose flour / Maida
½ C Chick Pea flour / Besan
¼ tsp salt
2 T Cashew powder (Coarsely ground) 

Egg wash (Optional) - 1 egg mixed with 1 T water
Cashew powder for garnish (Optional)

Method:

1.   Warm the ghee till it has just melted.
2.   Add in the powdered sugar and mix well to smooth out any lumps.
3.   In another bowl, sieve all purpose and chick pea flour along with salt, cashew powder and baking powder to mix uniformly.
4.   Then add in the melted ghee & sugar mixture into the flour mixture and knead well to form a dough.
5.   Let it rest to come together for about 2 minutes.
6.   Preheat the oven to 350oF.
7.   Form smooth, round ball with the dough. I used the tablespoon to measure out uniform sized biscuits. Flatten the balls slightly with cashew on top so that they have smooth edges.
8.   Optional: To add that shine onto your biscuits, whisk one egg with 1 T water and brush the biscuits before they go to bake.
9.   Place them to bake in the oven for 14 minutes till golden brown on top. Once out of the oven, transfer them to a cool plate/surface and let them cool till they crisp up.


The nan khatai turned out to be exactly as I wanted. This trial taught me that the delicate balance of chick pea flour and all purpose flour is very essential, since both of them are not interchangeable. Point to note, besan has more fiber content than all-purpose flour and when added in more quantities it results in the dough not being cohesive enough. So the proportion even though changeable, should be so taken care of that the dough adheres properly but by not compromising the nuttiness. Delighted by being able to replicate the delicate, nutty, crumbly and flavorful shortbread, I bring to you this recipe which I am looking forward to make several variations of.

Cheers to the official beginning of Fall, guys!
J

I am submitting this recipe to:
- "Celebrate Navratri and Diwali" hosted by Nayna and Jagruti Dhanecha.
- " Diwali Bash" hosted by Vardhini
- "Kid's delight: Healthy Makeovers" hosted by Rasi
- "Bake fest" hosted by Sumee and Vardhini.
- "Let's cook/bake for Valentine" hosted by Simply sensational food.

September 19, 2012

Unassumingly festive ~Kaju Badam Barfi~


Driven by intense conversations regarding “Barfi” (the Ranbir Kapoor one people!), I couldn’t help but think about the real and the first connotation the word “barfi” has had for me since childhood. In fact, it has also been the only thing I have been thinking for quite a while. Sounds strange??..well might be..but I just couldn’t help but think about the real barfi when that’s the word all over and I am very sure most of you must have lingered on the same too ;)

So with my injury healing quite fairly and with the upcoming Ganesh Utsav, I had been burning to make something new and exciting. It had been a while since I had done something rousing in the kitchen and should I say, I was dying to do so. But to be very frank, I had never thought of making Barfi EVER until last weekend and this was the first time I had even dared to look up recipes to help me make it. No matter how rich and delicious it might taste, this humble sweet had an awful impression of being cumbersome to make. Now since my Ma hadn’t tried it either, I turned to the usual help - our very own Google. As I scoured the internet for a recipe, the first recipe to pop up was that of talented Chef Sanjeev Kapoor. Each Sunday I was as excited to watch him at noon as much I was to watch Disney World at 9. Completely contrasting and confusing right? Well it seemed so to me too when I thought about it and it wasn’t until recently that I did.

This recipe is adapted from his version of the classic but there were certain steps  I decided to modify for ease and add in my own signature. The first change was to add in toasted almonds and little did I know that I was in for a pleasant surprise. Adding the toasted almonds gives a toasty undertone to the barfi and adds in a layer of additional jazz. The second change was the time I boiled the syrup. I wanted to boil the syrup till it was just ready and THEN add the nut mixture so that it too got a chance to simmer in the syrup. This way the mixture as well as the syrup got a chance to cook unlike other ones where it tastes raw. My first try was more of an experiment since I was yet to figure out the making and workings of the recipe. The end product turned out to be good regardless of the many follies I committed. Now equipped with the workings, I tried it again with my own twist and now I have a basic recipe for life. 

Kaju Badam Barfi/ Kaju Badam Katli

The inherent rich creaminess of cashews along with the toasty undertone of roasted almonds provides a pleasant twist to the usual candied cashew diamonds (aka barfi). Surprisingly simple and easy to prepare, this unassuming and dainty sweet is sure to wow your guests this festive season.

Ingredients: 
Adapted from this recipe by Chef Sanjeev Kapoor
(Makes 10-15 depending on the size)

½ C sugar
½ C water
¼ C Peeled & toasted almonds 
¾ C Raw Cashewnuts

¼ tsp rose water (Optional)
Roasted cashew halves for garnish (Optional)

Method:

1. Grind the cashews and the toasted almonds to a fine powder and keep aside.


2. In a non-stick pan over medium heat, bring the water and sugar to a boil. Boil the syrup over medium heat for ~ 5 mins till it gets viscous (one string consistency). 


3. Lower the heat and add in the cashew and almond powder while stirring consistently to avoid lumps. Add in the rose water and stir while simmering the mixture for ~ 7 mins till the mixture starts leaving the sides. Take off the stove while the mixture looks slightly runny. Don’t worry since the mixture soaks in the extra water while resting.


4. Let it cool till it’s touchable. Knead well till the dough is shiny and leaves oil. 


5. Roll out the dough into a thin layer and cut in the shape of diamonds. Garnish with toasted cashews to add the authentic hint.

Notes:

1.
To check for one string consistency, add a drop of the syrup onto a thin layer of water, it will appear as a viscous drop when ready.


2. To test if the mixture is cooked, wet your fingers and roll the dough in between your fingers. If it rolls into a ball, it’s done.

3. If the dough is runny still, cook it over the stove for a few mins till you achieve the required consistency.

4. If the dough hardens, use some milk to knead it.

5. Knead the mixture while it’s still warm. The dough seems less pliable, when it cools down completely. In between if it becomes difficult to roll, warm it briefly in the microwave and roll.

6. After rolling out the dough, use a piece of wax paper to smoothen out the surface of the barfi for a shinier and smoother finish.

7. To avoid wastage, roll out the left over sides while rolling out the barfi and roll again.

8. It stays fresh upto 2-3 weeks in the refrigerator and upto 1 week at room temperature.


While my second try at this sweet delight was a success, I am sure to try out different versions of this. I have been rattling my brains to think of new variations to this age old loved sweet and will sure update when I try any.
Here’s wishing you all a happy Ganesh Chaturthi! 

Have a great rest of the week,
J


P.s: I am submitting this recipe to:
- "Kid's delight" hosted by Valli.
- "Show me your dessert" hosted by Pari
- "Celebrate Navratri and Diwali" hosted by Nayna and Jagruti Dhanecha.
- "Diwali Bash" hosted by Vardhini
"Kid's delight: Healthy Makeovers" hosted by Rasi
- "Lets celebrate-Indian sweets" hosted by UK Rasoi
- "Diwali food fest" hosted by Anu
- "Bon Vivant #10: Festive feast" hosted by Sumee.
- "Diwali Bash-2013" hosted by Vardhini from Cook's joy

September 7, 2012

Usual fare - Unusual way ~ Spiced & baked cauliflower bhaja~


What happens when life hands you a lemon? well of course, make a lemonade right? now don't get me wrong over here..this post has nothing to do with lemons, lemonade or anything remotely citrusy for that matter...but it most definitely has to do with that unfateful day when a normal walk down a classroom turned fatal for my wobbly left ankle. It decided to take a twist leaving me immobile for a while (seems like eternity though .. *sigh*). Now that means me being away from my haven - the kitchen (if you didn't know that already..duh!) for a while. I accepted the challenge (err the lemon) and the message - with a lot of grace. It was high time I took things slowly and literally keep my feet up. This creation actually signifies that laid back approach to making something absolutely gorgeous sans the scrambling around. It signifies the ultimate ease of preparation for anyone who wants the break or wait- gets handed over that break ;)

Now without digressing any further and running the risk of losing your interest..let me say this recipe was the brainchild of my utterly immobile condition teamed with the desire to make something scrumptious for my loved one who untiringly and unselfishly looked after me. Like they always say..any emotion is best expressed in the form of good food. So here I was scrambling my brains to make something mouth watering when this big cauliflower blob stared right back at me. Instantly I was flooded with memories of fried cauliflower florets tossed with potatoes and spices. Mmm..A yum staple at my place. Since frying was out of option, baking was the next best treatment I could think of. Honestly, I had always wanted to bake veggies in the oven, but the hands-on person that I am, watching the food simmering over the stove gives me an unknown satisfaction. So this was just the perfect time to toss everything together and let it bake till golden brown, soft, sweet and utterly delightful, while I kept my feet up. It turned out to be so good that I have been warned of dire consequences if I didn't blog about it. So you see I HAD to share this with you.

Does anyone remember the sogginess of the cauliflower florets when cooked for slightly longer in the effort to get them thoroughly cooked? I confess that I have been the victim many a times and that's what has kept me away from cauliflower for a long time. But here I am, back to being friendly with the cauliflower. The sweetness with the spiciness, the softness with the crunchiness provides the perfect blend of textures and flavors and who can forget the melt-in-the-mouth buttery-ness of roasted garlic. It literally took me to new highs.

Spiced & roasted cauliflower bhaja


Surprisingly and delightfully addicting- this roasted and spiced Indian cauliflower-potato-garlic side dish has the perfect blend of sweetness, crunchiness and the charred undertones essential to kick this simple dish up a notch. Must I say - it's as simple as 1-2-3. 

P.S. Bhaja is an Odia term for any dry and sauteed side dish.

Ingredients: (Serves 2-3)

1 medium sized Cauliflower
2 small potatoes - Cubed
7-8 whole cloves of garlic
1/2 tsp turmeric powder
1/2 tsp red chilli powder
1/4 tsp Pav bhaji masala (Optional)
1/4 tsp salt (Adjust according to taste)
1/4 tsp sugar
4-5 T Olive oil
Dash of lemon juice (Here comes the lemon!)
Chopped cilantro for garnish (Optional)

Like I said- 1-2-3 ;)

Step 1: Cut the cauliflower into medium and equal sized florets. Peel the garlic and cube the potatoes.

Step 2: Mix all ingredients together and make sure to rub the florets well with the oil and spices. Everything should be coated well with oil. Add more oil if required.

Step 3: Pre-heat the oven to 400oC. Spread out the cauliflower mixture on a sheet pan so that it forms more or less a single layer. Bake for 30-40 mins while tossing every 10-12 mins.

Garnish with cilantro and serve with rice or rotis.

Notes:
- Preheat the sheet pan in the oven too. The sizzle that you hear when the cauliflower mixture is added to the pan is what gives it the nice crust.

- Just learned on Dr. Oz that olive oil retains its properties much better when tossed with veggies prior to adding to the pan rather than heating the oil IN the pan. So this method earns brownie points for retaining the health benefits of the oil too. Very interesting.

Truly, this recipe has made me very happy about being able to use my oven for anything else than baking the occasional cake/ brownie/ cookie. I am glad it now feels a lot less neglected since I am sure to use it a LOT in the coming months experimenting with ALL kinds of veggies. Try it and you will know what I am talking about. 

Have a great weekend all you mobile folks!
Ciao
J

Submitting this recipe to:
- "Bake fest" @ Zesty Palette and by Vardhini
- "Kid's delight" hosted by Valli.
- "Kid's delight: Healthy Makeovers" hosted by Rasi
- "Cauliflower recipe link Challenge" hosted by  Sliceoffme and to Citrus Spice UK

August 26, 2012

"Cheese"-y tricks ~ Marinated & grilled Matar Paneer

Ask any staunch vegetarian about their opinion of paneer and chances are that you might witness them profess their undying admiration for the same.Paneer or fresh cow's milk cheese holds a very special place in the appetite of Indian vegetarians. Need I mention that India is the largest producer of milk in the world? Well..that kind of explains the bias. By now you all might be aware that I am by no chance a vegetarian..and couldn't imagine being one either. So my relationship with paneer has always been more of an obligatory one. Those auspicious days when eating non-veg is a taboo..paneer or chenna is the more obvious and sophisticated choice. Its not that I am a staunch non-vegetarian either but one of my major concerns about any paneer preparation (atleast the ones that I have tasted) has always been that the flavor never penetrates well enough for the whole chunk to taste like the curry. It always seems like a blob of cheese floating in a very flavorful broth without any connection whatsoever. I guess many of you who are not blinded by "paneer- love" will agree with me on this.

So inundated with demands for paneer dishes at my place, I gave in to the pleas. Having reluctantly worked with it many a times following age old recipes, I tried my hand at treating it with more care than required. I promised to treat it with as much if not more respect as I would to any meat. Say meat, and marination becomes synonymous. Even though meat of any kind is marinated to tenderize, impart more zing and make easy the cooking process, my whole and sole reason for marinating paneer was to add more flavor to the paneer chunks so that it melds well into the gravy.

Agreeing on how I want to treat my "cheesy" subject, I marinated it with lemon juice, chili powder, little bit of ginger garlic paste and turmeric powder (how can I forget THAT! hehe). Left it to marinate overnight and grilled the chunks on a hot grill pan to achieve smokiness and of course the eye-appealing rustic grill marks. Trust me..it was SO much better. The flavors of the marinade had percolated into the chunks and each bite tasted so much more appealing to my discerning taste buds. I have been using this trick whenever I have time at hand to marinate (which is not an absolutely essential step but nonetheless vital) and must I say ...I have been converted.

This trick I am sure is bound to please the non-paneer lovers and for ardent paneer fans, this is going to top it. Just try and let me know!


Marinated and grilled Matar Paneer

Marinated and grilled paneer (Indian cottage cheese) cubes soak in the flavors of an aromatic, spiced tomato gravy while pairing perfectly with the mild sweetness of the green peas.  A twist to the popular Matar Paneer, it can easily be made royal by adding in a dollop of fresh cream at the end. Serve it with the Pudina aau matar palau for a complete vegetarian fare. 

Ingredients:
14 oz paneer/400g - Cut into 1 inch cubes.
For marination:
2-3 T Lemon juice
½ tsp Turmeric Powder
½ tsp Chili Powder
½ T Ginger Garlic paste

¼ tsp Salt

3 T Oil
1 inch piece of cinnamon
2 cloves
½ Nutmeg
½ C onion paste
2 T ginger garlic paste

½ C Fresh tomato paste

Make a paste of the following powders in 1 C water:
1 tsp cumin powder
1 tsp coriander powder
½ tsp chili powder
½ tsp kashmiri chili ½ tsp garam masala
¼ tsp Salt

1 C Green peas
Chopped cilantro for garnish (Optional)

Method:


1. Marinate the block of paneer all the ingredients for the marinade. Cover it and keep it overnight in the refrigerator. 
Note: I usually cut the paneer into cubes (1 inch) and marinate them, it leads to better marination.

2. Pour 1 T of oil on a grill pan over medium high heat and grill the paneer pieces (1 - 2 mins ) and keep aside. The pan should sizzle when the paneer is thrown in, that would ensure nice grill marks.


3. Heat oil in a pan over medium heat and add oil. Once the oil is hot, add in the whole spices. Once fragrant (~ 20 secs) add in the onion paste. Stir for about 1-2 mins till dry and then add in the ginger garlic paste and the tomato paste.


4. Stir the above mixture consistently (8-10 mins) so that it does not stick. Add in the paste made of powdered paste 2 T at a time. Let the mixture dry before adding the next 2 T.Continue till the oil separates.

5. Now add 2 C of water to the mixture and simmer till oil floats (~ 5 mins).

6.Then add in the grilled paneer cubes and then after ~ 5 mins add the in the green peas. Simmer for 15-20 mins over low flame.

Taste for salt and other seasonings and serve hot with Pudina aau matar pulau. Opt out of the matar in the rice if it becomes too much of peas in a meal.


This marinating and grilling technique was quite a revelation for me and I have wondered why it has not been done before. Is it lack of time or may be the fact that paneer is so universally loved in any shape and size that no one really bothered to think about it? Hmm..I might keep guessing till I find the answer but in the meantime if you do know the answer then stop by to let me know. Till then..

Enjoy!
J
I am submitting this recipe to:
-"Desi Vidheshi food fest" hosted by Kalyani
- "Cook with spices- Cinnamon" hosted by Revathi and Anu.
- "Celebrate Navratri and Diwali" hosted by Nayna and Jagruti Dhanecha.
- "Simply Sides" hosted by Sumee.